5 Rules for Testing Ultrasound Image Quality
Ted Lucidi, CBET from Innovatus Imaging, got back to the basics with ultrasound and provided some tips for testing image quality.
Wed Sep 01 2021
Recently, a customer reached out for some tech support for troubleshooting an image quality complaint from one of his sonographers. He had only just started supporting ultrasound and wanted some quick tips on assessing image quality. There are numerous testing criteria that can be used to qualify image quality and over 100 variables that can affect overall image quality, but I thought this to be a great opportunity to get back to the basics with ultrasound. 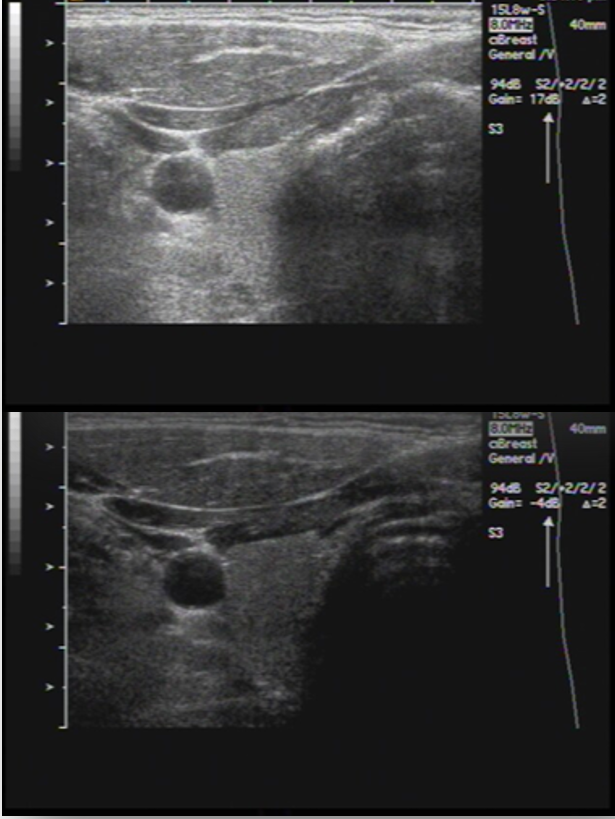 Same Probe, Same Scanner, Different Settings-Very Different Image
Believe everything your customer says. Despite if a problem is identified, or NOT identified, something occurred that placed doubt in the performance of one or maybe even several imaging devices: the scanner console, the probe(s), accessories or external devices. One item on which to coach customers is providing a well-defined complaint. It’s one item that can significantly impact downtime or troubleshooting efforts. Often times, troubleshooting comes down to the subtle and patient process of eliminating variables versus a quick, head-on approach.
I’ve been told by many sonographers that, “this patient’s images just don’t look that good.” Besides being a very vague description of the issue, variations in human tissue have the potential to affect overall image quality as well as have the potential to introduce several types of artifacts. A key rule in this modality is: Always use a phantom to assess image quality. Due to variations in human anatomy, overall image quality should never be assessed using patient images. A tissue mimicking phantom offers consistency and can help remove multiple variables from a diverse and complex troubleshooting tree.
While looking at the patient images from above, it is good to note the system preset used during the patient study. A system preset is a single menu selection that pre-configures dozens (if not up to a hundred) user-based settings on the scanner. It tailors the scanner’s (and probe’s) performance for the particular patient study. The preset’s name is typically listed in the header of the image, such as carotid, adult echo, or abdominal. The challenge with presets is that they are software based and so they can become corrupted, edited, altered, or even deleted. To rule out more variables: Be sure to assess image quality using a factory preset. It could be that someone edited a custom preset, and it affected the image quality when using a particular probe during a particular type of study. Factory presets are not able to be edited and offer yet another level of consistency to the troubleshooting process.
A next-step in minimizing variables is to Perform a side-by-side image quality comparison. This requires using two probes of the same exact model, plugged into the same system console, using the same, identical, system settings, imaging on a tissue mimicking phantom. This type of testing can pose a challenge as the technician would have to locate a like probe, but it can provide a significant level of confidence when troubleshooting overall image quality (given one or both probes does not have a performance problem).
If a side-by-side comparison just isn’t possible, another solid tool would be to test the probe on a different, but identical, system console and determine: Does the reported complaint follow the probe. The same rules as above still apply: a well-defined complaint, phantom usage, factory preset, and same system settings. The challenge in this scenario may be locating an identical system. Probe models do cross scanner models, but not all scanner models provide identical system settings, available presets, or level of image quality (example, GE Logiq S8 and Logiq E95). Both systems may support the 9L-D, but the image displayed by the same probe model on the two different system models may be inconsistent. The image may be consistent between two E95’s but may not be between differing models (S8 and E95).
I’ve been asked, “Is there one test that could serve as a good overall baseline or foundation for assessing image quality?”. Both the ACR (American College of Radiology) and AIUM (American Institute of Ultrasound in Medicine) cite multiple tests for thoroughly assessing and documenting image quality. In my opinion, Overall Image Uniformity serves as the foundation for all other image quality tests (axial/lateral/functional resolutions and others). In the field, if a probe or system is unable to produce a uniform image within acceptable criteria, there is no need to proceed with any further assessments until corrective action is taken to address non-uniformity. Once uniformity has been re-established, more thorough testing can be performed.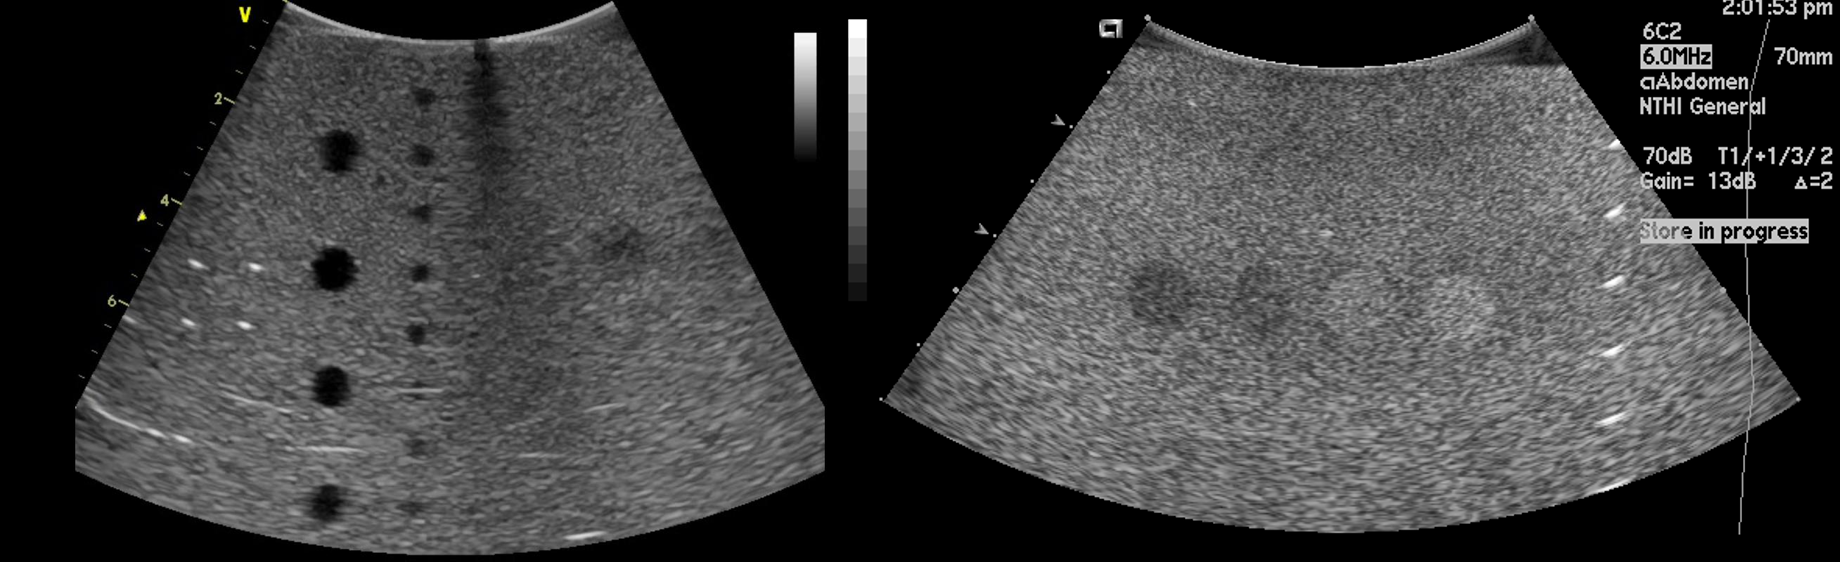 Image Uniformity Failure Image Uniformity Pass
What I’ve provided merely scratches the surface and helps to establish a strong foundation for troubleshooting basic image quality concerns. The team at Innovatus imaging has authored multiple how-to guides for assessing image quality and for performing quality assurance assessments. All are available, at no-charge, in the Resources section of our website. https://www.innovatusimaging.com/resources/ or by emailing info@innovatusimaging.com. Innovatus Imaging welcomes the opportunity to hold educational webinars for HTM organizations and professionals that cover this topic and more.